Dartlang #4: Welcome page
Today we are actually going to code something finally. As a good starter, we will build the welcome page, which is what users see when they first got to the website.
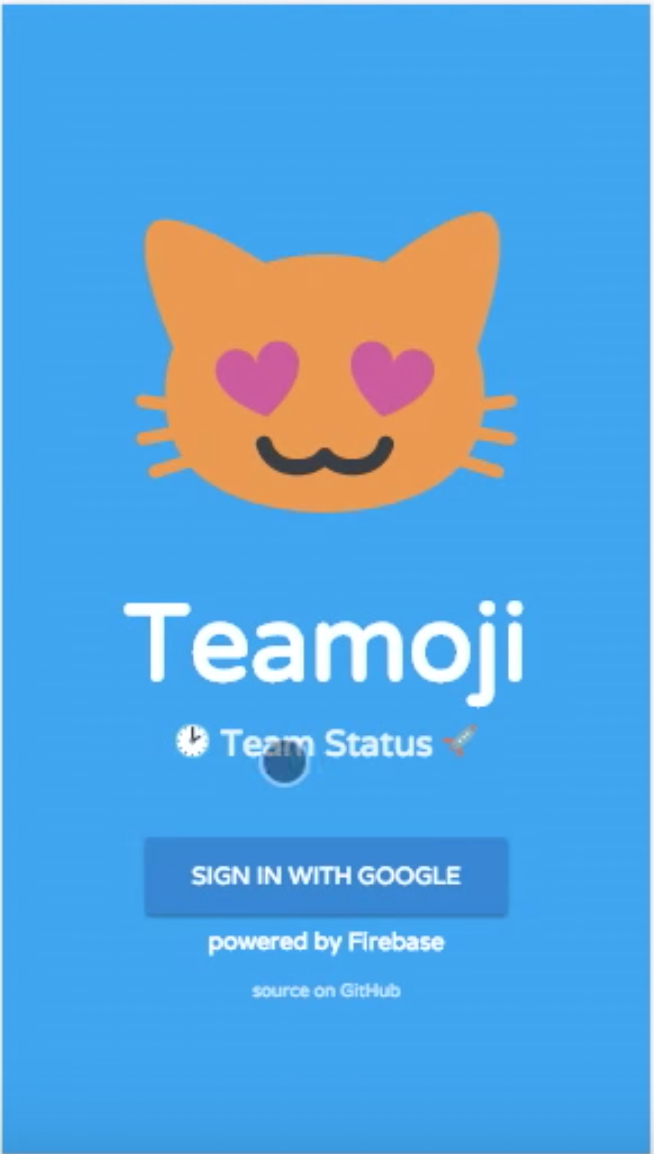 Our mock
Note: if you like to follow along the tutorial, make sure you pull from this commit as this will be our starting point onward. Also, basic dart syntax and AngularDart architecture are assumed, if you are not sure about them, check out AngularDart’s official site.
Step 1: got the content up
Before we get into placement and styling, the first thing is to have some content to show obviously. So in the current app, remove todo/ directory, since we are not building a TODO list. Instead, add a package named welcome, create a component as WelcomePageComponent(with blank html and css for now), and configure AppComponent to point to that.
// app_component.dart

@Component(
  selector: 'my-app',
  styleUrls: const ['app_component.css'],
  templateUrl: 'app_component.html',
  directives: const [materialDirectives, WelcomePageComponent],
  providers: const [materialProviders],
)
class AppComponent {
}
//app_component.html

<welcome-page></welcome-page>
This is basically saying “now my app component is just the welcome page component”, which is fine for now. We will first build individual pages, and then worry about routing and redirections.
In welcome_page.dart, add the content according to the mocks, and then just place them in divs in welcome_page.html.
// welcome_page.dart

import 'dart:async';
import 'package:angular2/angular2.dart';
import 'package:angular_components/angular_components.dart';

@Component(
  selector: 'welcome-page',
  templateUrl: 'welcome_page.html',
  styleUrls: const ['welcome_page.css'],
  directives: const [
    MaterialButtonComponent,
  ],
)
class WelcomePageComponent {
  String get appTitle => 'Teamoji';

  String get appSubtitle => '\u{1F551} Team Status \u{1F680}';

  String get appIcon => '\u{1F63B}';

  String get signInMessage => 'sign in with google';

  String get appMainFooter => 'Powered by Firebase';

  String get appSubFooter => 'source on github';

  Future<Null> login() async {
    print('Login not implemented yet');
  }

}
For the emojis, I used standard Unicode to show them. You can find a complete list of emojis and their corresponding Unicode encoding here. This will be important when we implement the emoji selection page.
<div class="tm-welcome">
    <div class="tm-app-icon"></div>
    <div class="tm-main-header"></div>
    <div class="tm-sub-header"></div>
    <material-button raised class="tm-login-btn" (trigger)="login()"></material-button>
    <div class="tm-main-footer"></div>
    <div class="tm-sub-footer"></div>
</div>
For now you can safely ignore the classes assigned, we will use them for styling later. One thing worth noting is that face that we are not using a regular for the login button, but a. This is the main package for our project since material design looks better and has many built-in functionalities handy. Check out this site for more detail on AngularDart material components.
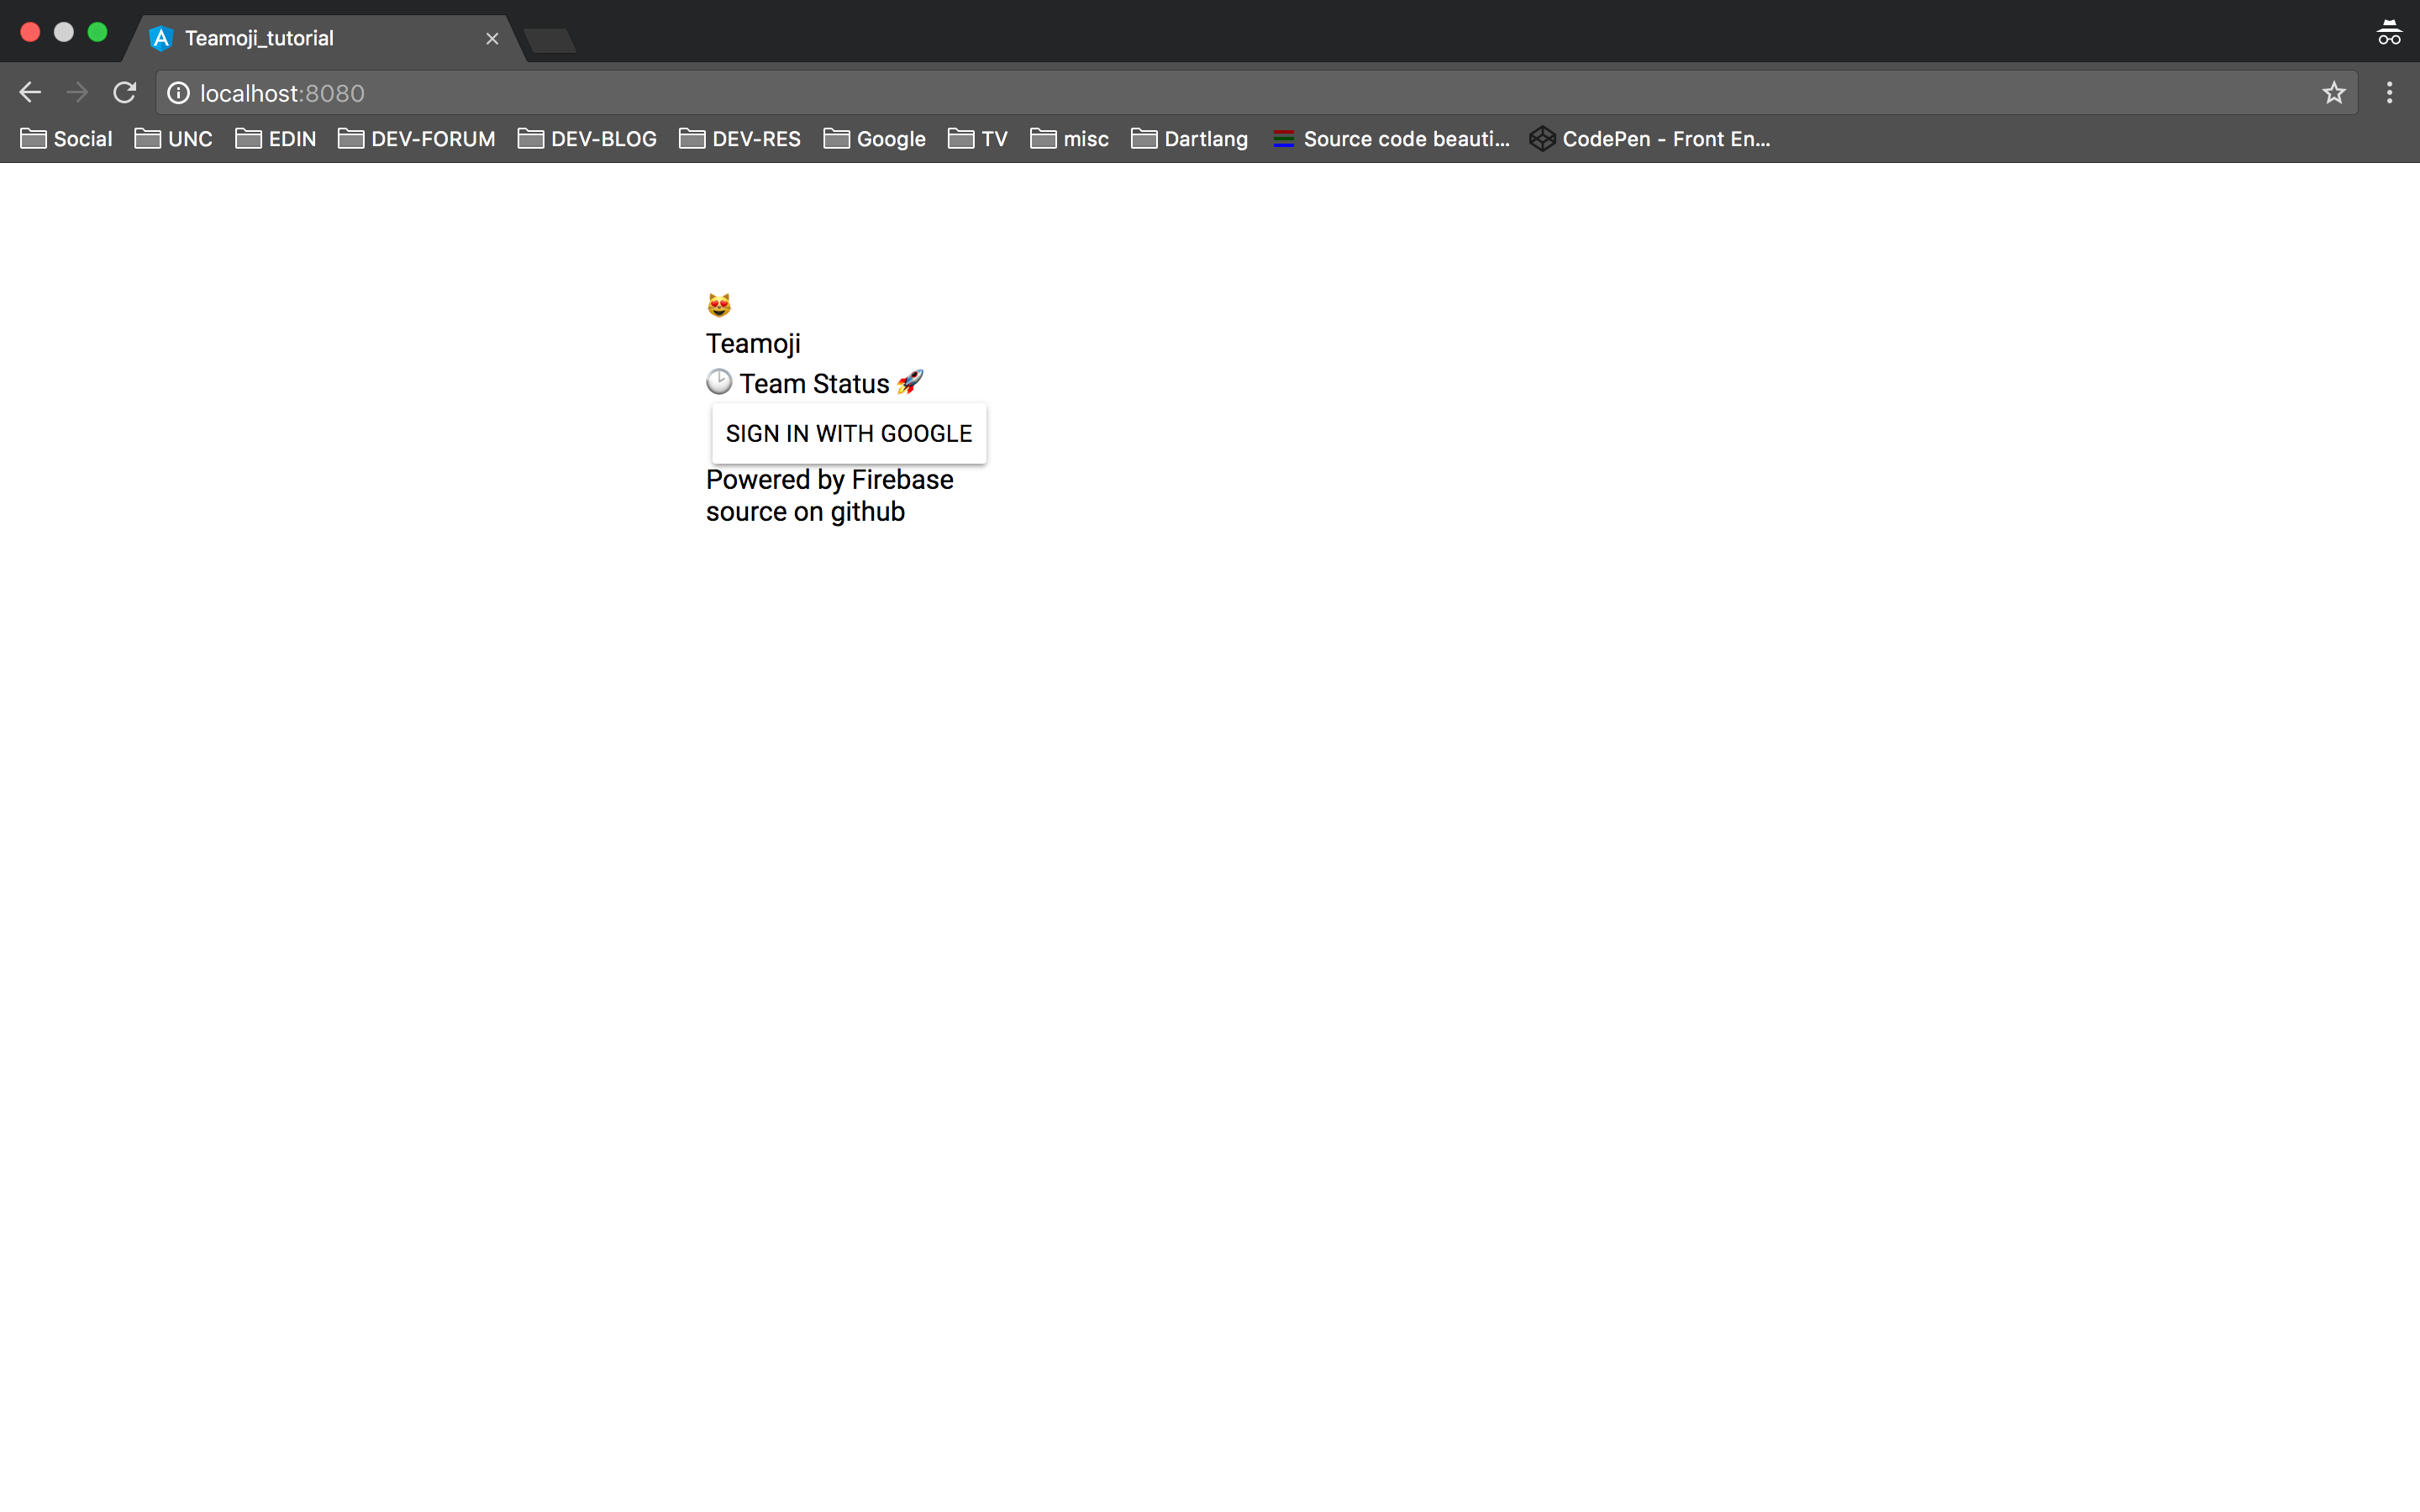
After all these work, run pub get and pub serve on the command line, then load the page on localhost. You should see something like this:
Step 2: Add styling
So we have all the content on the page, that’s 50% done! Next is to make the content look like the mock. Starting from the easy bits, these are what we can do.
Environmental styling
These are stylings that should affect most tags, so they should go into styles.css under web/:
html, body {
    height: 100%;
    width: 100%;
}

body {
    margin: 0;
    background-color: deepskyblue;
}
Here we make the component to fill the page, and have a light blue background color.
Tag specific styling
Here we make specific changes to each tag, using the classes we set earlier. These include font size, color, `padding, etc. I won’t go into too much detail, but here is the code:
:host {
    font-family: "Lucida Sans Unicode", "Lucida Grande", sans-serif;
    color: white;
}

.tm-welcome {
    height: 100%;
    text-align: center;
}

.tm-app-icon {
    font-size: 125px;
}

.tm-main-header {
    font-size: 40px;
}

.tm-sub-header {
    padding: 0 0 20px;
    font-size: 16px;
}

.tm-login-btn {
    background-color: dodgerblue;
    margin: 20px 0;
}

.tm-main-footer {
    font-size: 12px;
    padding: 5px 0 10px;
}

.tm-sub-footer {
    color: lightgrey;
    font-size: 10px;
}
After these changes, the page should look like this:

Placement
This in my opinion is the hardest part. What we want is to have the top level div centered both horizontally and vertically. Let’s see the code first:
.tm-welcome {
    height: 100%;
    justify-content: center;
    align-items: center;
    display: flex;
    flex-direction: column;
    text-align: center;
}
The first 4 lines make the div centered on page, but the children divs are horizontally aligned. To change this, adding flex-direction: column; would line those children vertically. To be honest, CSS is kind of hard to make work, and you need to use trial and error to get what you want.
Conclusion
If everything works good, you will see our page now looks almost close to the mocks.

 Looks good in mobile as well :D
Let me know if there’s something confusing in this tutorial, and I will fix it and keep that in mind as we go on. This week we will build the “Create team” page, which is also quite simple, but we will see another material component. Stay tuned!