Dartlang #5: Create Team
Today we continue with our Teamoji web app. My apologies for putting this off for so long, everything has been a bit crazy because of the moving. Now that I am done with that, the series will pick up as usual. In this post we focus on 2 components: EmojiRenderComponent and CreateTeamComponent. All the code can be found in our Github repo; you will also notice there are some new component there which I haven’t talked about. We will cover them in the upcoming few posts, no worries. So without further ado, let’s get started.
EmojiRenderComponent
You may realize that there is not any particular page that this matches to. That’s because this component will be a sub-component for many other components. Think about the big fox emoji we have in the welcome page. If we take a look at the create team page, it also has a big emoji on the page.

Can we somehow just have one component that simply shows a configureable emoji? Since Angular Dart is component based, we should be able to reuse this common component every time we need to show an emoji. It’s very clear that having an EmojiRenderComponent avoids duplicate code and helps a lot with readability and maintainability.
So how do we go about building such a component? Turns out it is almost too simple, with the @Input() from Angular. Let’s take a look at the code first, and I will explain it.
emoji_render.dart
import 'package:angular/angular.dart';

@Component(
  selector: 'emoji-render',
  templateUrl: 'emoji_render.html',
  directives: const [
    NgStyle,
  ],
)
class EmojiRenderComponent {
  @Input()
  bool useBigIcon;

  @Input()
  String icon;
}
emoji_render.html
<div>

</div>
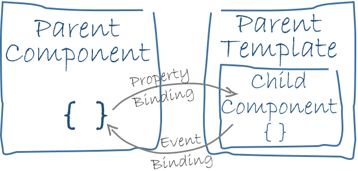
First let’s look at the @Input() thing. There’s a detailed doc on Angular Dart official site, but essentially think of components like a tree. For the parent to pass something to its child component, the child must declare an input to be assigned. Conversely, when the child wants to propagate something to the parent, usually an event, it must declare an output. We have used the input here, but we will see the output being used in other components soon.
Also an interesting feature of Angular is shown here too: NgStyle. Normally if we want to set some style dynamically to a div, we assign different classes to it on the fly. This in my opinion is unnecessary and ugly, since you end up with class names like blue-btn, which is just to generic, and if you have to switch a button from blue to red on the fly, you have to remember to remove the blue-btn class, otherwise sometimes the button will stay as blue.
In Angular, after including the NgStyle directive, we can define a specific style to be evaluated from a dart expression. Here the font-size is controlled by the Boolean variable useBigIcon. Incidentally, this variable is also an input, which means the parent can decide either to show a big emoji, or a small one. Flexible.
After this is created, we can replace the emoji template in WelcomeComponent with the following. You would also need to include EmojiRenderComponent in the directive list for this to work.
[code lang=html]
- <emoji-render [useBigIcon]=”true” [icon]=”appIcon”></emoji-render> [/code]
This may seem like a small change, but I think it is very important to have modularity in your codebase.
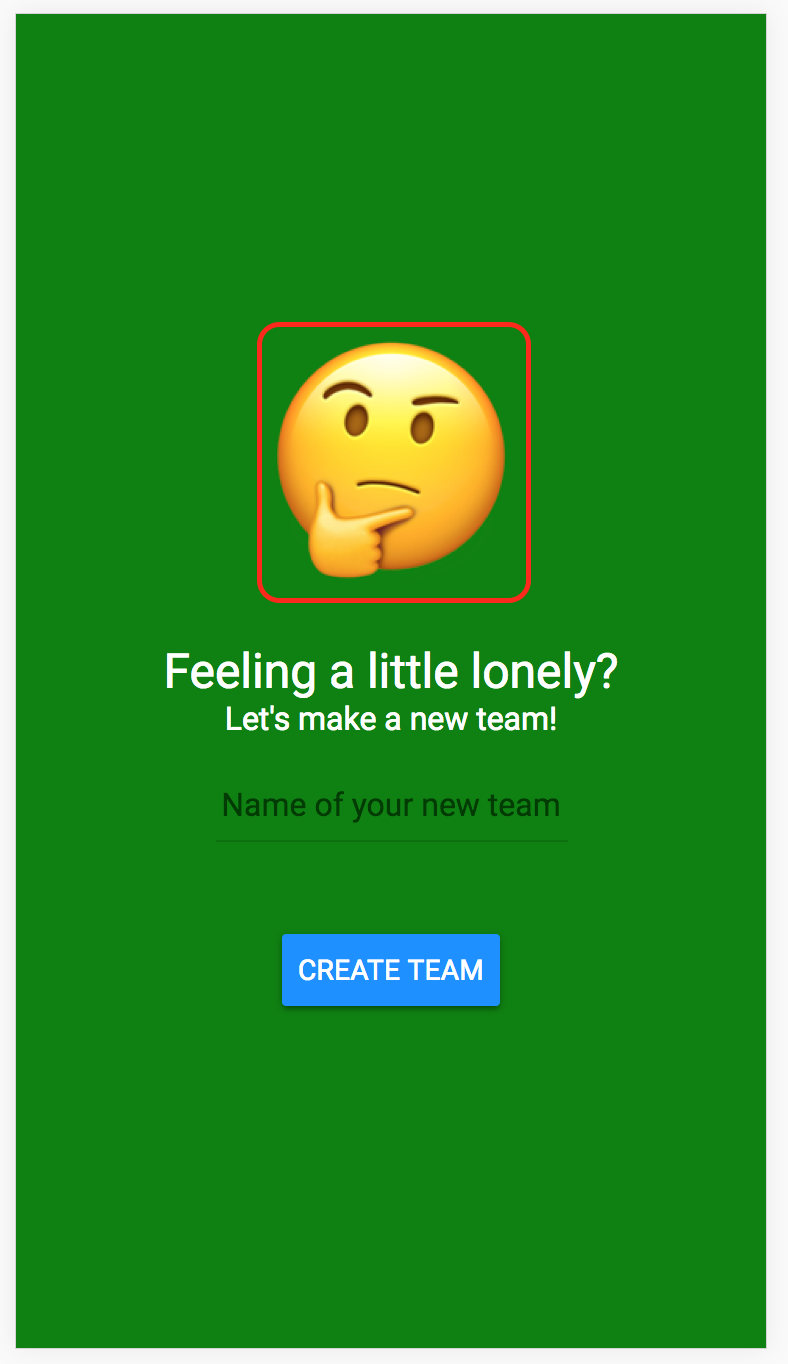
CreateTeamComponent
Ok now that we have the building blocks, let’s actually build the component for creating teams. This is pretty trivial, since the overall structure will be the same with our existing WelcomeComponent. Take a look(no css here but you can find it in the repo):
create_team.dart
import 'dart:async';
import 'package:Teamoji_tutorial/src/common/messages.dart';
import 'package:Teamoji_tutorial/src/emoji_render/emoji_render.dart';
import 'package:angular/angular.dart';
import 'package:angular_components/angular_components.dart';
@Component(
selector: 'create-team',
templateUrl: 'create_team.html',
styleUrls: const ['create_team.css'],
directives: const [
EmojiRenderComponent,
MaterialButtonComponent,
MaterialInputComponent,
],
)
class CreateTeamComponent extends CreateTeamMessages {
String newTeamName = null;
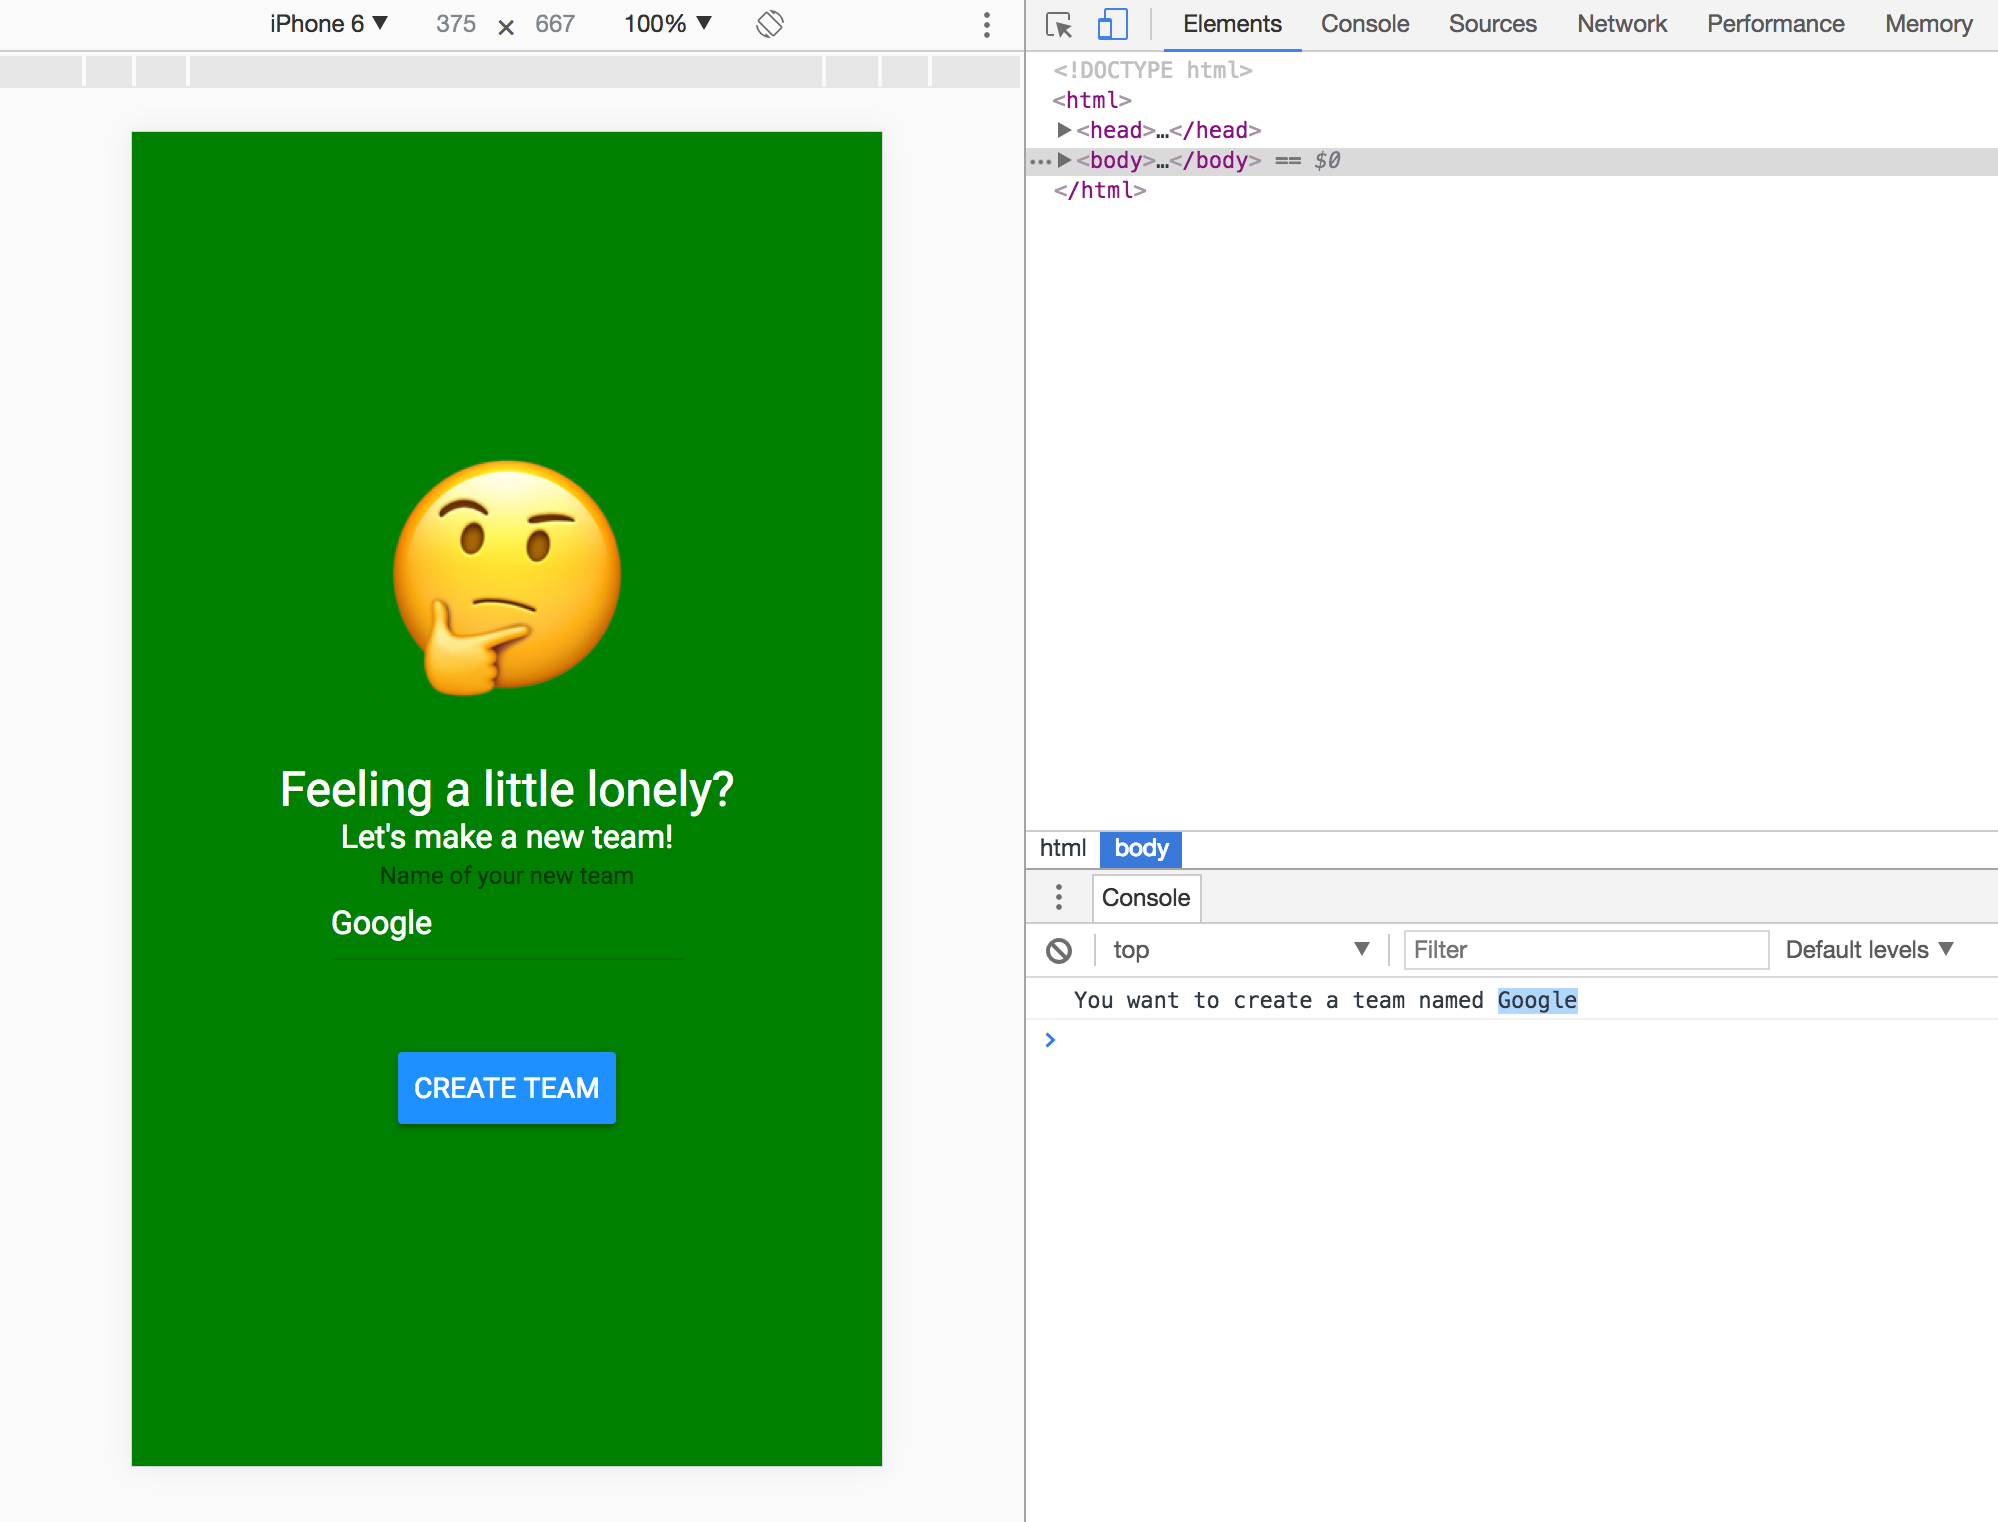
Future<Null> create() async {
print('You want to create a new team called: $newTeamName');
newTeamName = '';
}
}
create_team.html
<div class="tm-create-team">

<div class="tm-prompt-header"></div>
<div class="tm-prompt-content"></div>
<material-input
floatingLabel
label="Name of your new team"
name="text"
(change)="newTeamName = $event">
</material-input>
<material-button
raised
class="tm-btn"
(trigger)="create()">

</material-button>
</div>
You can see we are re-using EmojiRenderComponent here too, which was the reason we built that in the first place.
Here the interesting thing to look at is ``. You will notice there’s an “attribute” we associate with this tag: (change)="newTeamName = $event". This is the output event binding we glossed over earlier.
Consider you are the input box yourself. You have the user’s input, but you yourself can’t make much out of it since you are just a generic input, and you have no idea what the user’s input is about. It could be a name, an email address, etc. However, your parent would probably know what that’s for and can take care of the input. As a result, you pass your input value upstream as an event. Here change is the name of the event, meaning the input value has changed, and the parent’s action to that is to assign the newest input value to a variable.
You might be wondering: ok that’s very cool, but how would I know what event these material components are emitting, and what type of parameter are associated with it? You can find detailed documentation about these components in the AngularDart Material component repo. In our case it’s the material input.
Once you have these all understood and in your project directory, change your AppComponent to show CreateTeamComponent and run pub serve.
Conclusion
In this post we are getting into the Angular world, with input/output binding, and more practice with material components. Most importantly, it is of great importance that we stick to the basic software engineering principles, in this case modularity. In the next post we will continue to build all the components we need and once we have all the components we need, we can start integrating Firebase in.
Hope you enjoyed this. Let me know if anything is unclear or can be improved.